
Your digital portrait can look nice in many ways, even if you are still learning. Try small changes each time, and you will get better while you have fun.
1. Soft Light Self-Portrait
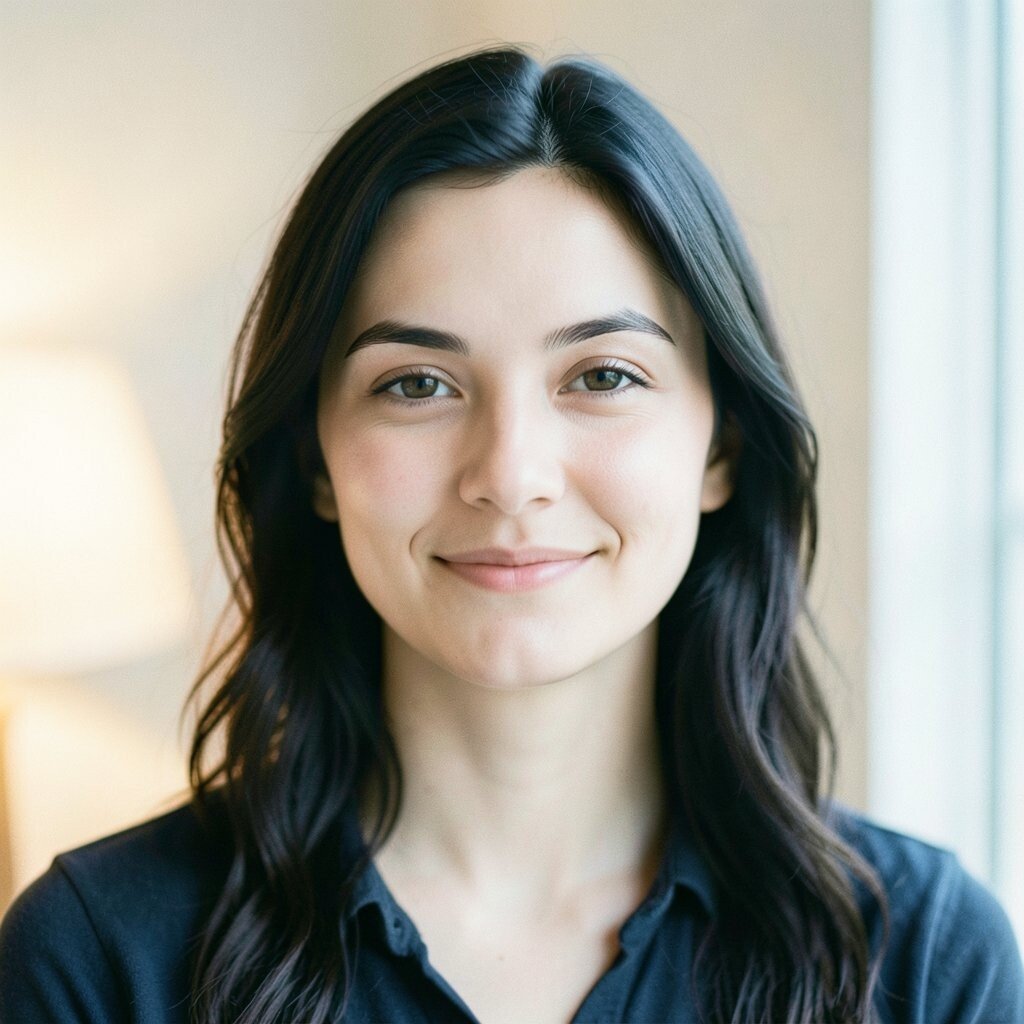
Use a gentle light so your face looks calm and smooth. You can set a lamp near a window or use photo editing to lower harsh shadows. This style helps your features look clear without strong glare.
For a unique look, try one color for the light, like warm yellow or light blue. Keep the background simple, like a plain wall or a soft blur. If you want more depth, add a faint grain effect so it feels more like a photo.
To personalize it, pick an expression you can repeat, like a small smile or a relaxed look. For cost, you only need basic editing tools and a steady light source. This look stays popular because it feels natural and easy to wear.
2. Mirror Reflection Portrait
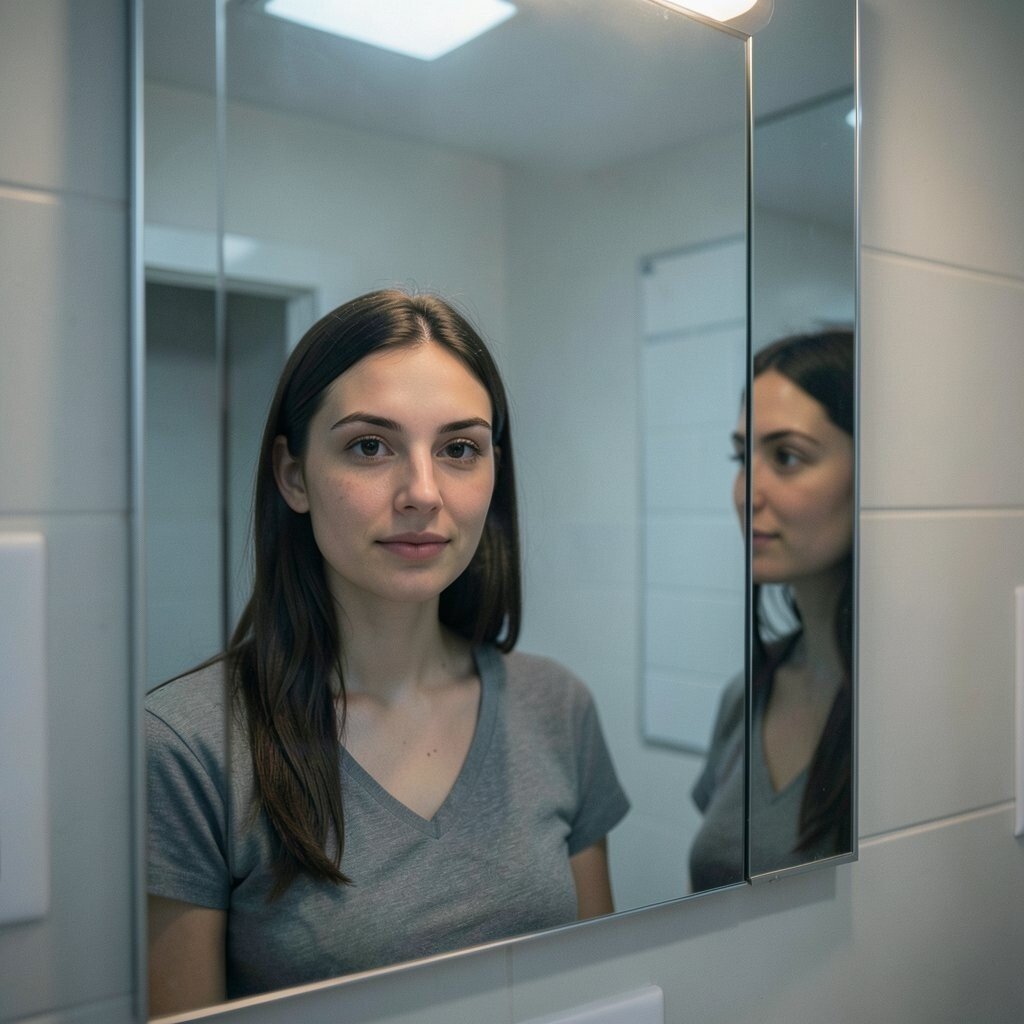
Face a mirror and take a photo that shows the glass and your reflection. This gives you a neat frame and adds a real-life twist. You can also angle the camera so the mirror edge shows, which makes the scene feel more real.
Add a small edit to change the mood, like a cool tone or a bit of warm light. If you draw over the image, use thin lines to copy the mirror shape. That makes it feel different from a flat portrait.
Try this with a clean bathroom light or a hallway light for quick results. The cost is low because you use what you have at home. This idea fits current trends where people like everyday scenes and real angles.
3. Minimal Line Art Portrait
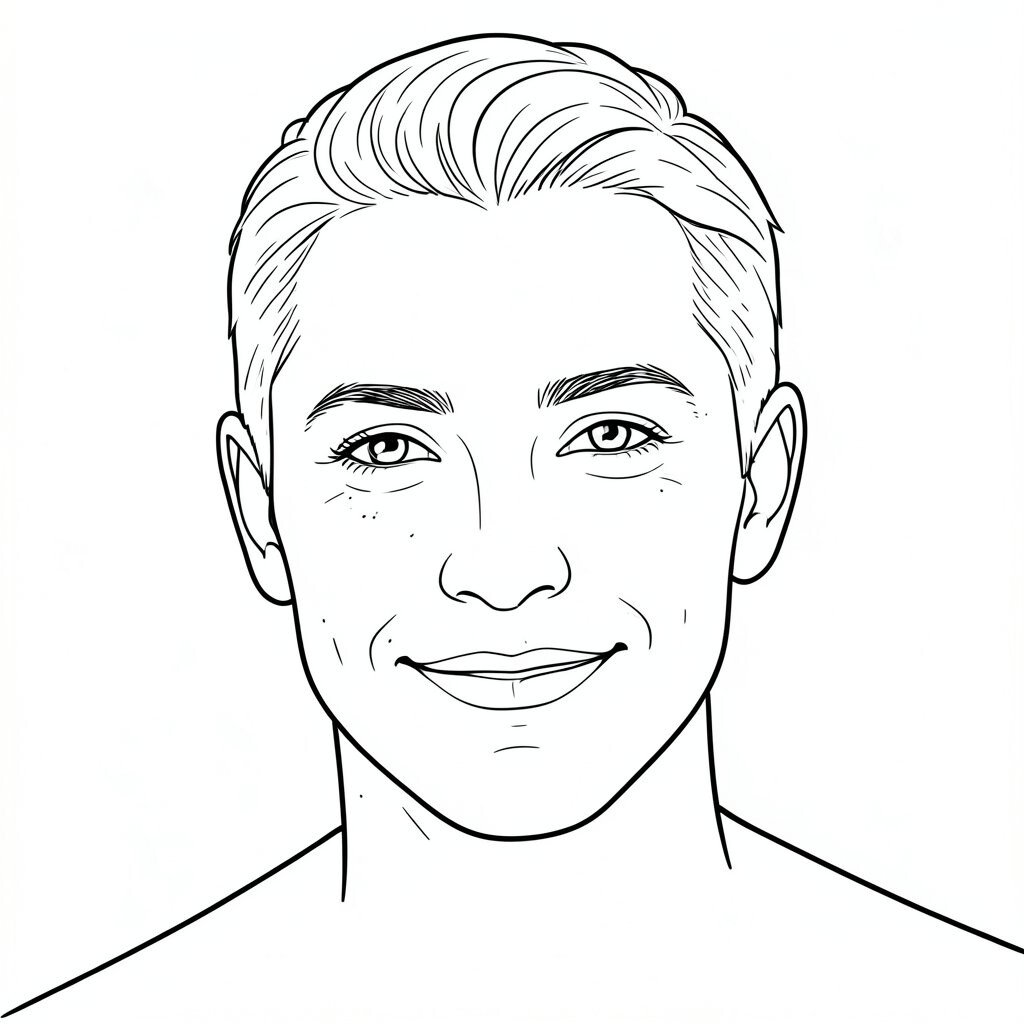
Start with a black and white image and focus on your outline. Then trace your face with clean lines, like a single continuous stroke. This method makes your portrait feel calm and graphic.
To keep it unique, pick one feature to make stronger, like your eyes or your smile. You can add tiny line details around the hairline or add a few dots for texture. Avoid heavy shading so the lines stay crisp.
Personalize it by using your own style of lines, such as thicker at the jaw or lighter at the cheeks. Many free apps have line tools, so cost can be very low. This style matches a trend toward clean drawings that look good on social posts.
4. Collage With Old Magazine Shapes
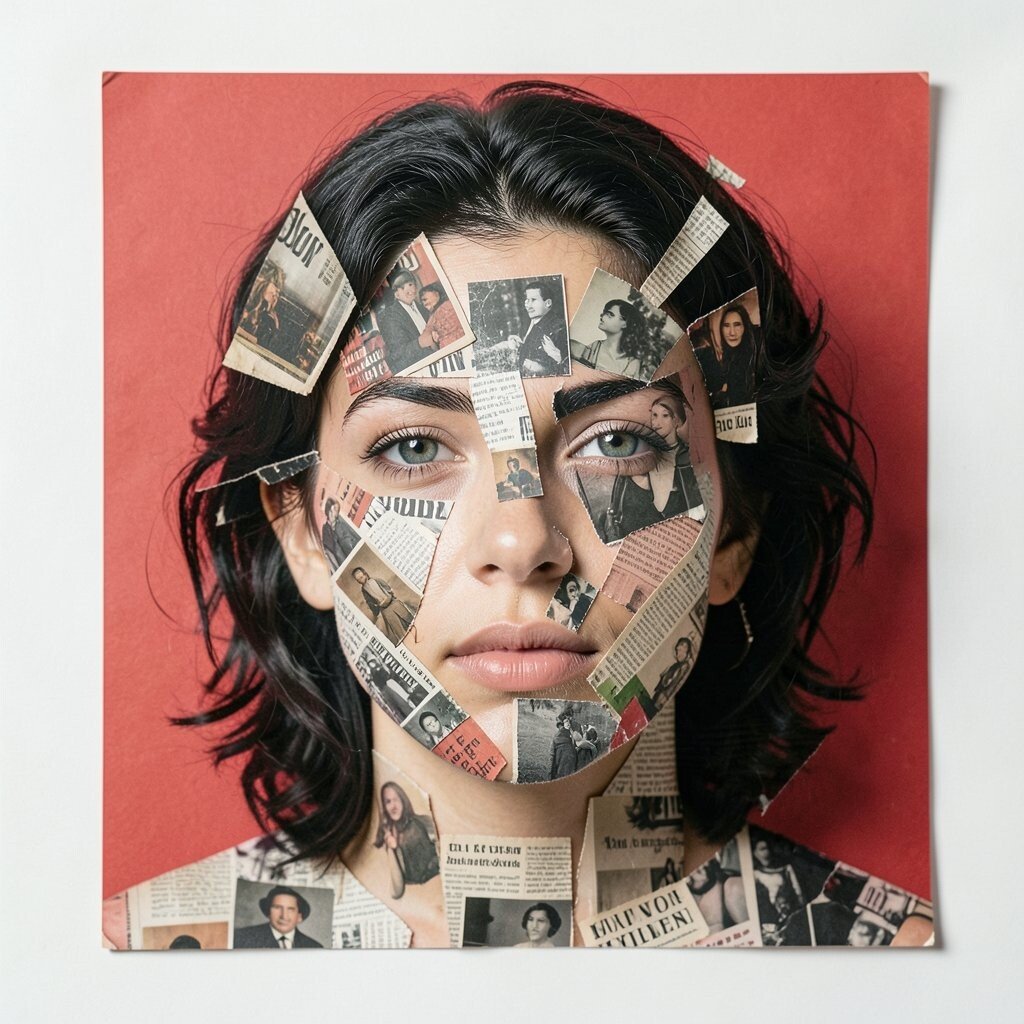
Cut shapes from printed paper or use digital scraps that look like paper. Place pieces over your face and hair, then blend edges so it still looks like you. The layers create a busy, fun look that still keeps your identity.
For a uniqueness boost, use one theme color, like red for the background pieces. Add one solid paper block behind you so the portrait has a clear focus. You can also make the eyes stand out by keeping them clearer than other areas.
Try using thrift store magazines to keep the cost down. If you do it digitally, most collage tools are simple and cheap. This idea stays popular because it looks artsy and gives a lot of room to play.
5. Pixel Art Portrait
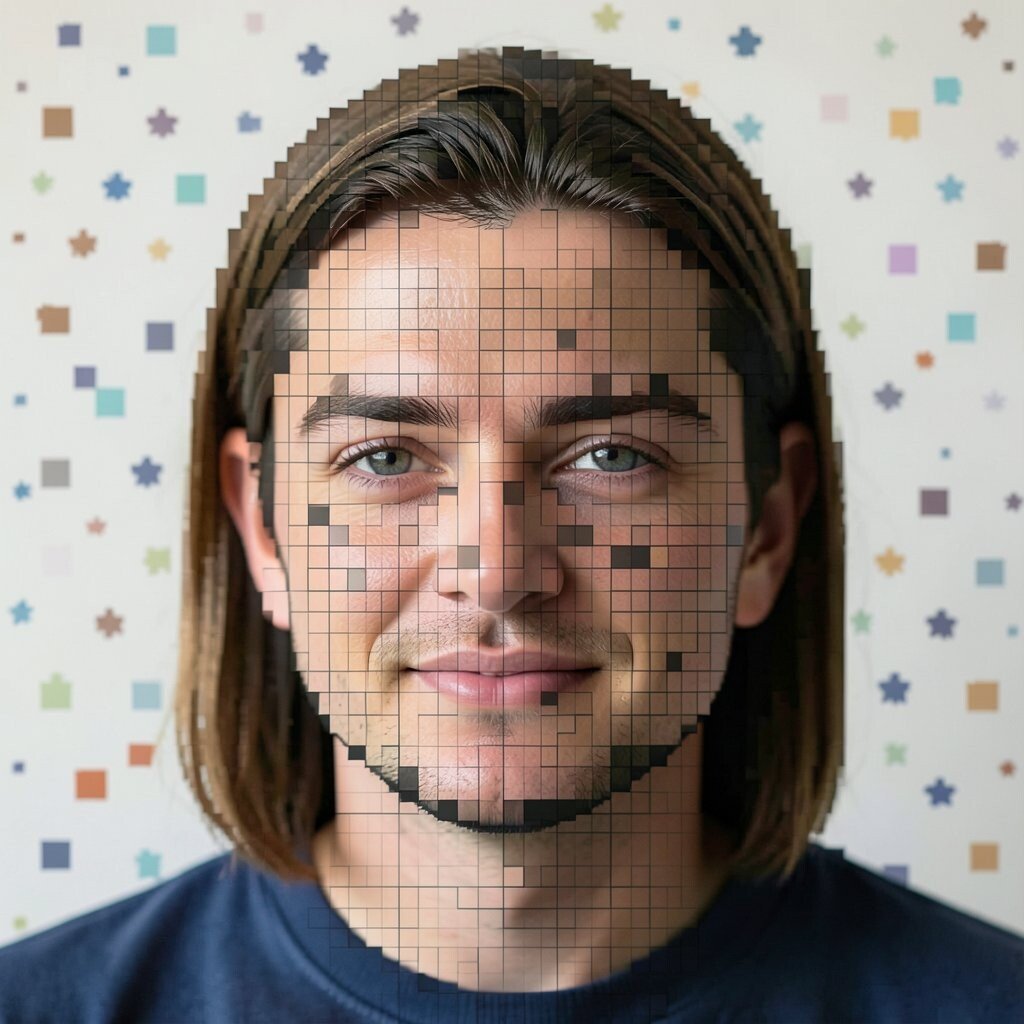
Turn your face into a grid of square dots by using pixel tools. Pick a small palette so the portrait looks neat and consistent. Pixel art can make a normal photo feel playful and new.
To make it personal, choose colors that match your usual look, like your hair tone and eye color. You can also add a background pattern, like small stars or simple blocks. Keep key details, especially the eyes, to help people recognize you.
For cost, many pixel apps have free trials or low prices. This style is still in trend because it matches games and screen culture. It also looks great when you use a profile size format.
6. Charcoal Sketch Style
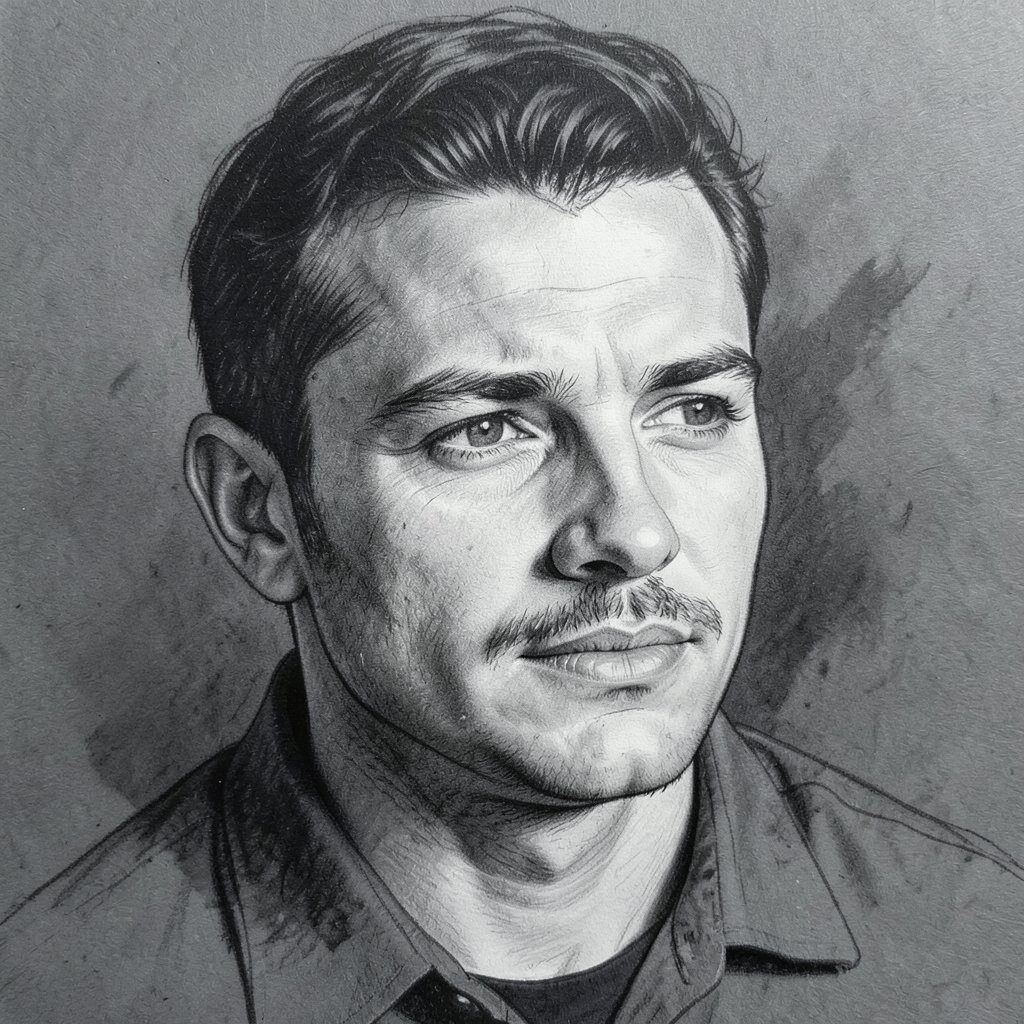
Use a brush that mimics charcoal or pencil. Build up the face in layers, starting with light marks and then darker areas around the eyes and hair. The goal is to keep some soft smudges so the sketch looks human.
Make it unique by changing the background, like using a darker gray paper texture. You can add a few strong lines on the nose or jaw so it looks more detailed. Try not to overwork every part, because rough edges help the sketch feel real.
Personalize it by copying a real photo you like, then adjusting the angle to suit you. Tools for sketching can be free, especially on tablets. This look is common in art feeds because it feels classic and easy to share.
7. Color Block Portrait With Bold Shapes

Use large shapes to form your face, like blocks for the cheeks, forehead, and jaw. Pick bold colors and keep edges neat. This style turns your portrait into something like modern design.
To keep it unique, mix skin tones with unexpected colors, like adding a teal shadow under the chin. Use a simple background that matches one of your colors. If you want more clarity, draw your eye shapes with clean lines.
Personalize it by using colors from your clothes or your room decor. Cost is low if you use basic shape tools in editing apps. Bold block portraits also fit current trends because they look strong and clean on screens.
8. Watercolor Wash Portrait
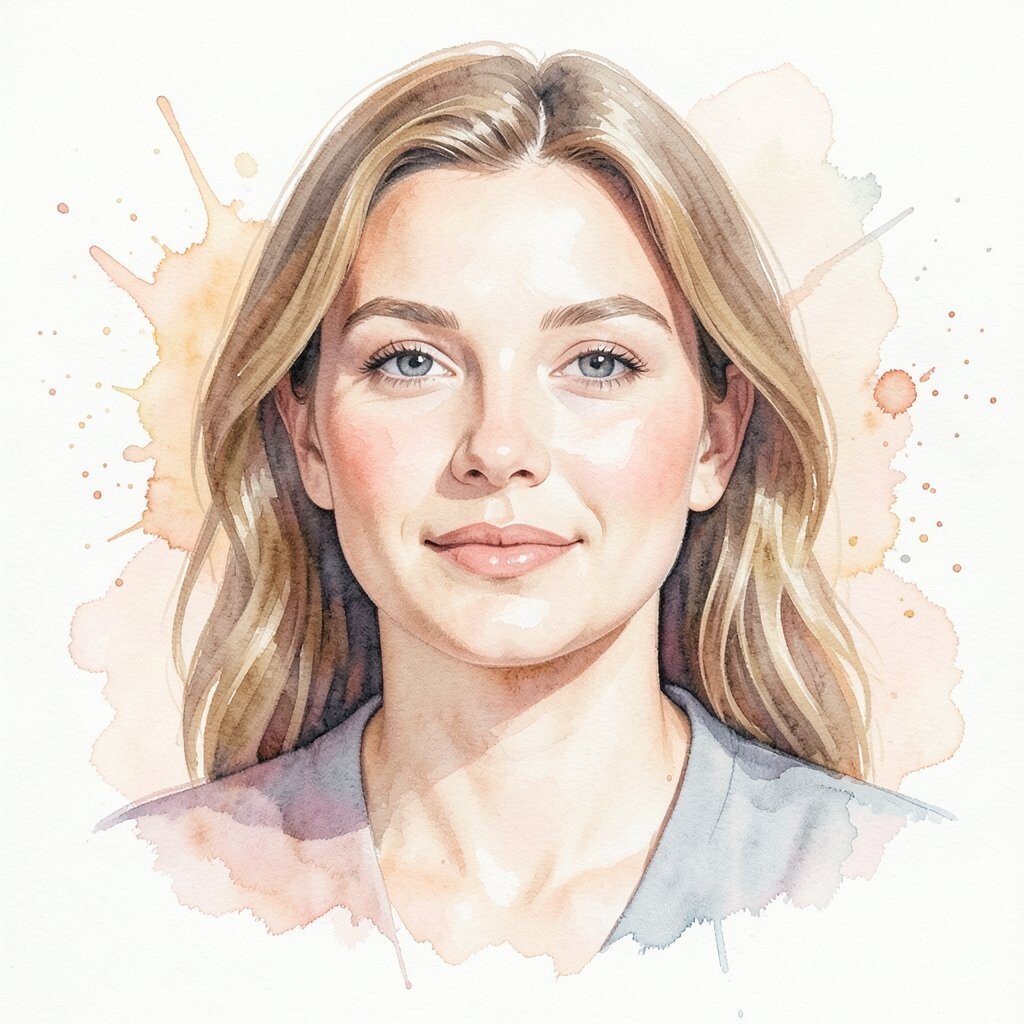
Create a portrait with soft paint-like edges and gentle color fades. Start with light washes for skin and hair, then add darker areas slowly. This method helps your face look soft and relaxed.
To make it unique, add a few paint splatters near the background, not on your face. You can also let some colors bleed for a more natural feel. Keep the eyes sharper than the rest so the portrait still looks like you.
Personalize it by choosing colors that match the mood you like, like peach and light brown. This can be done on paper with real paint, or digitally with brushes. It costs little at home, and it stays popular because it looks warm and not too perfect.
9. Cinematic Portrait With Side Lighting
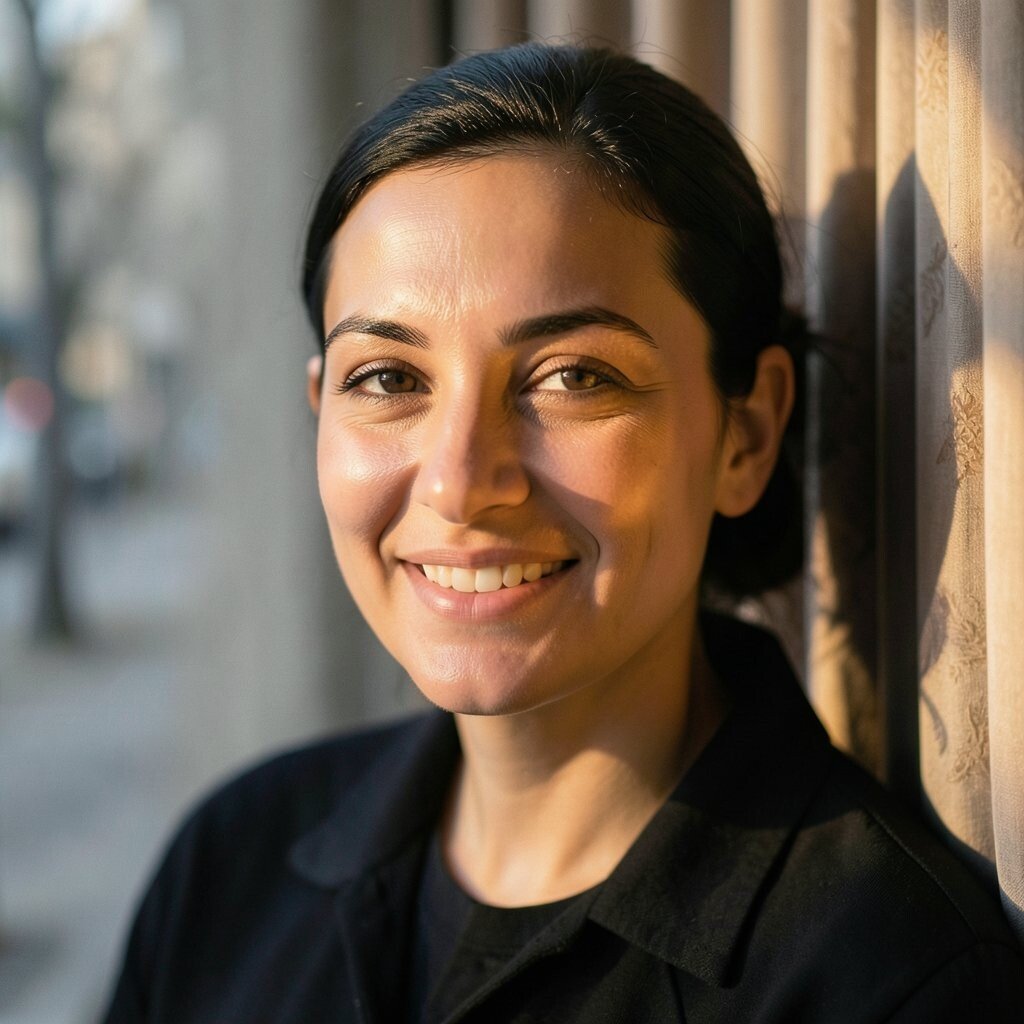
Use lighting from one side so half your face is brighter and the other side is softer. You can set a lamp at a side angle or edit your photo to add side shadows. This gives a movie-like feel without making it too hard.
For uniqueness, add a subtle haze or lens blur in the background. Keep the focus on your eyes and add a small glow around the bright cheek. Make sure the contrast is not too strong so your face still looks friendly.
Personalize it with a specific background like a curtain, a wall, or a simple street scene. Cost is low if you already have a phone and a lamp. This look is trending because people like dramatic lighting on realistic portraits.
10. Fantasy Costume Portrait With Simple Props
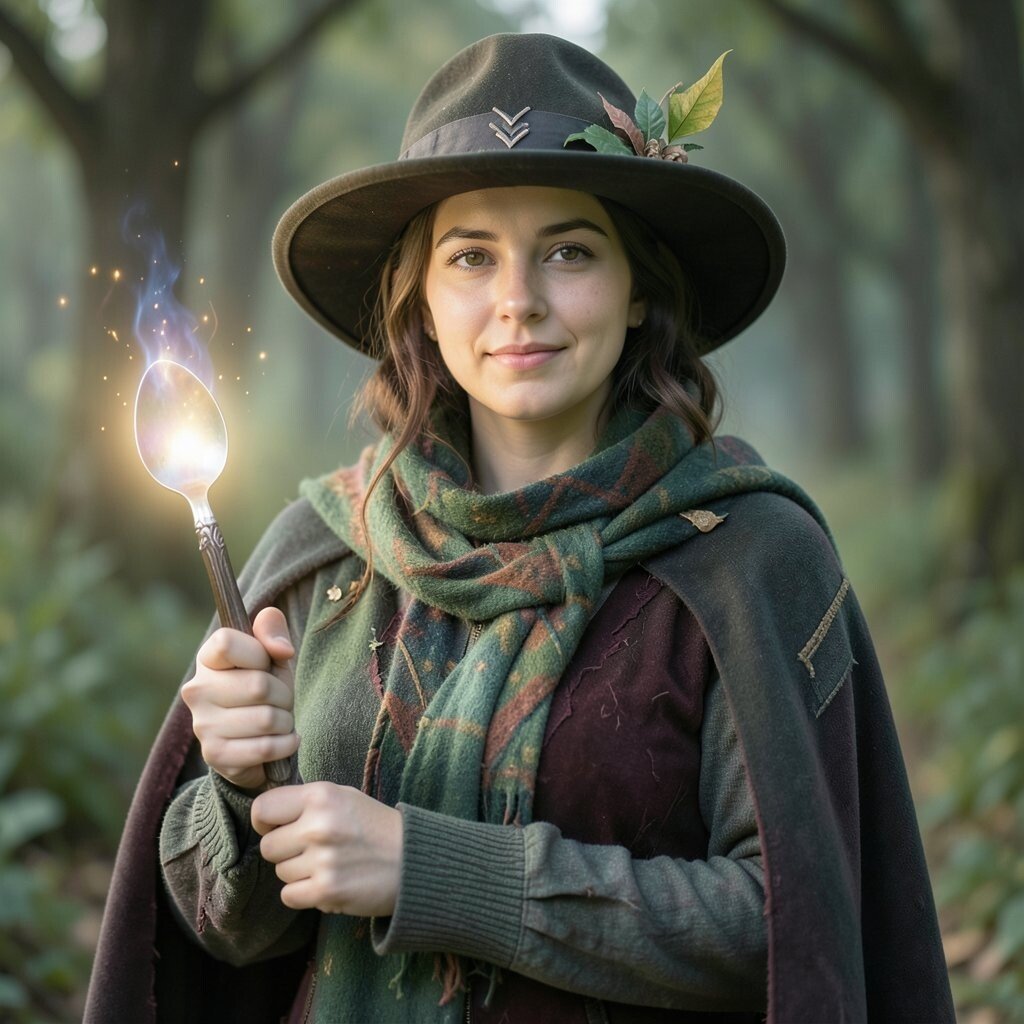
Pick a costume idea you can do with simple items, like a scarf, cape, or hat. Then add digital edits to blend the costume into your portrait. The result feels like a story, but you still look like yourself.
To keep it cost-friendly, use things you own first. For example, a kitchen spoon can become a “magic wand” with a small glow effect. Add only a few effects so the portrait does not look too messy.
Personalize it by choosing a theme that matches you, like nature, space, or old myths. Tools for adding light effects are often easy to use. This idea is unique because it mixes real you with a playful setup.
11. Vintage Photo Style With Film Grain

Make your portrait look like an old photo by adding film grain and warm tones. You can also lower sharpness a bit and add a slight tint. This makes the image feel like it has a past.
For uniqueness, try a fake stamp, a border, or a light leak effect. Place the portrait in a layout like a classic album scan. Just be careful that the face stays clear so it still looks like you.
Personalize it by using your own background and outfit, then let the edit carry the vintage vibe. Cost is usually low because most photo apps have presets. This style keeps showing up in trends because many people like the “old but nice” look.
12. Neon Glow Portrait With Dark Background
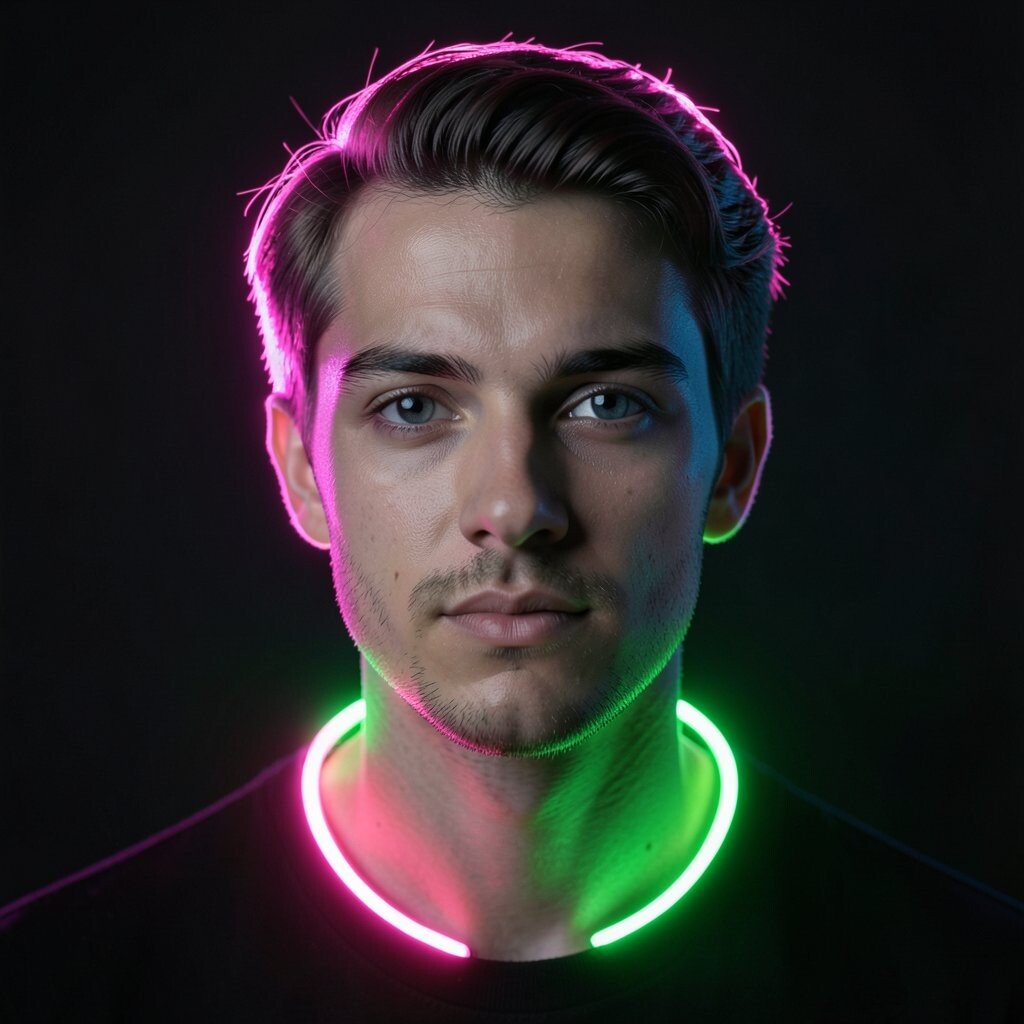
Use a dark background and add neon colors to your edges or hair. The glow can follow the shape of your face so it looks like light is wrapping around you. This style stands out fast on screens.
To make it unique, choose two neon colors you like, such as pink and green. Add a glow on your collar, and keep your eyes bright but not too blown out. Keep the rest darker so the glow feels strong.
For cost, you can do this with simple editing tools. If you want a real neon effect, you can also use colored light at home, like a small LED strip. Neon portraits match current trends because they look bold and modern.
13. Double Exposure Portrait With Nature Shapes

Blend two images together, like your portrait plus leaves, clouds, or simple tree branches. Use soft blending so your face still stays readable. This style can feel calm and artistic without heavy drawing.
For uniqueness, pick nature shapes that fit your story, like water for a calm mood or flowers for a bright mood. Adjust contrast so your eyes are still clear even with the added layer. Keep the background pattern light so your face leads the image.
Personalize it by choosing images you take yourself, like a walk photo of plants or sky. Costs can be near zero if you shoot your own photos and use free blending options. This technique fits trends because it looks both real and made-up.
14. Hand-Drawn Background With Your Real Portrait
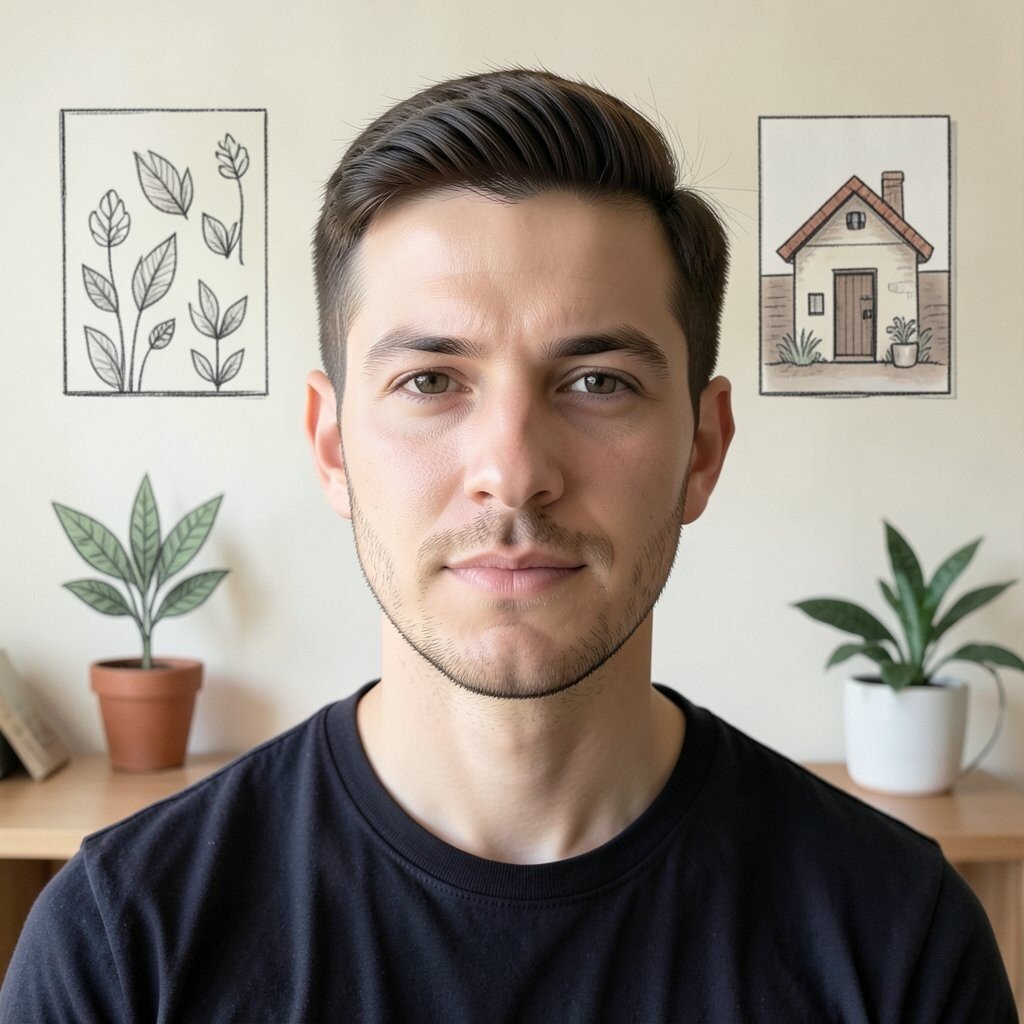
Keep your face more photo-like, but draw a background behind you with simple shapes. You can sketch a room, a pattern, or symbols that match your hobby. This mix makes the portrait feel like a real person plus your own art style.
To make it unique, choose one background detail to focus on, like a small house shape, a plant, or a favorite pattern. Use a limited color set so it does not distract from your face. You can also add light shading behind your hair to blend the drawing with your photo.
Personalize it with items from your space, like a wall color or a poster design. Cost is low if you draw with a tablet or even with simple tools in an app. This idea fits current trends where people mix photo realism with small art touches.