The room can feel festive fast when you use what you already have. These DIY ideas are easy, budget-friendly, and fun to make.
From cozy lights to stylish wreaths, you can add holiday cheer without a huge project. Pick a few and enjoy the process while the season is still bright.
1. Pinecone Twinkle Garland
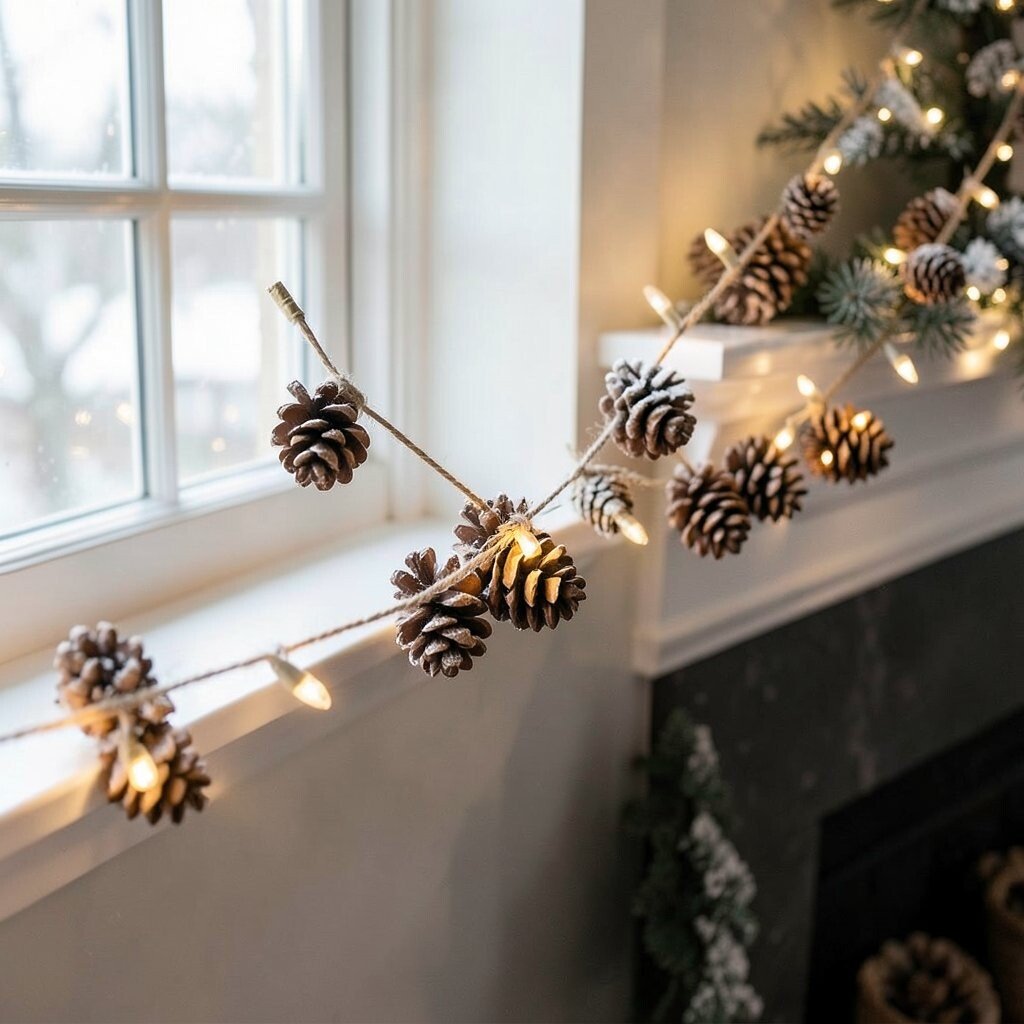
Picture a string of warm white lights wrapped with pinecones, making your mantel look like a winter forest. It feels cozy because the textured pinecones catch the light in tiny sparkles.
Start by tying pinecones in a small cluster, then add a few spaced out along a thin garland wire or jute twine. Choose pinecones that are dry and clean, and seal them with a light spray of clear matte if you want less shedding.
For practical setup, hang the garland along a window frame or drape it over a shelf rail. A neat personalization idea is to paint just the tips with gold or use a dusting of faux snow for a frosty look.
2. Photo Memory Holiday Strips
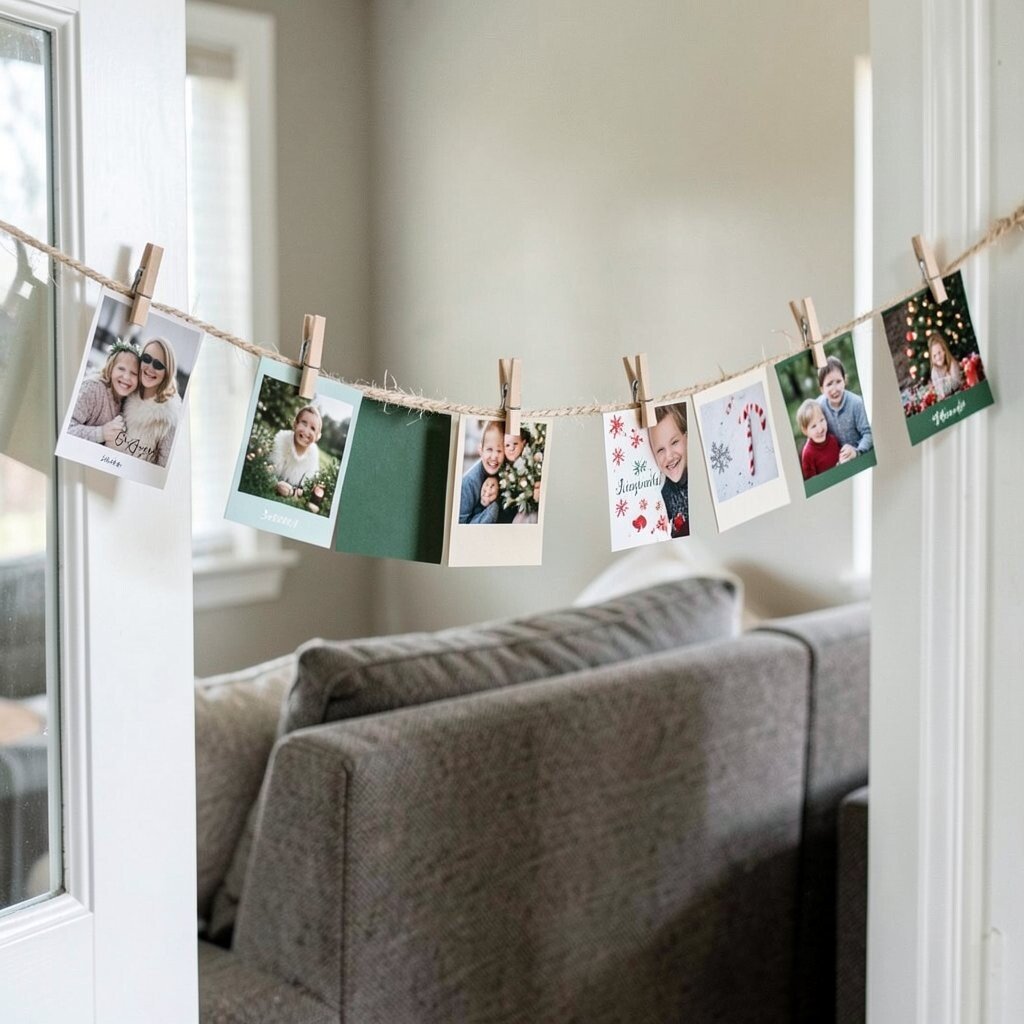
Imagine a line of little holiday photos clipped to twine, like a timeline of your best moments. It brings warmth because you can see familiar faces every time you walk by.
Cut several strips of cardstock or scrap paper in simple rectangles, then write a short season phrase on the back and glue a photo to the front. Use mini clothespins for quick swapping so the display stays changeable year after year.
Hang the twine across a doorway or behind a couch, and keep the spacing even for a tidy look. If you want trend-friendly style, use matching colors like deep green and cream, or add a few plain cards in between the photos for breathing room.
Costs stay low since you can reuse old frames, print photos cheaply, and repurpose cardboard. Personalize it by mixing candid snapshots with holiday-themed prints like snowflakes or candy canes.
3. Cinnamon Stick Scent Ornaments
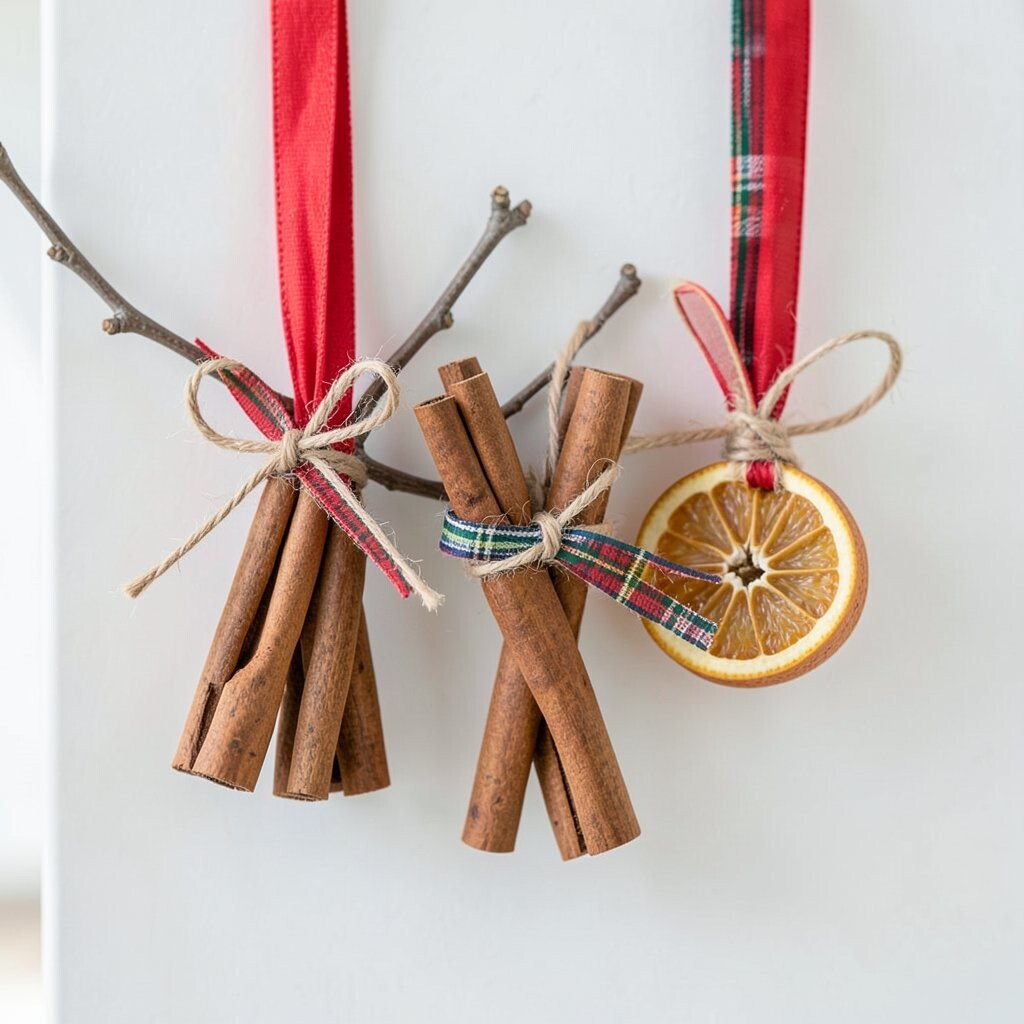
Think of cinnamon ornaments that smell like cozy kitchens the moment you open a cabinet. They add a handmade touch that looks rustic and inviting.
Wrap cinnamon sticks with thin twine and tie small loops at the top, then attach them to ribbon or a thin branch. You can also place two sticks together and tie them with a bow for a fuller shape.
For practical tips, keep them in a covered area at first so the scent lasts longer, and avoid placing them where they’ll get wet. If you want extra charm, add a few cloves or a tiny dried orange slice on the ribbon.
Cost-wise, cinnamon sticks are often cheaper than store ornaments and they double as a craft ingredient for baking. Personalize the look by using different ribbon colors, such as red for classic style or plaid for seasonal comfort.
The scent is the uniqueness, but the clean lines of the twine make it look modern too.
4. Reindeer Block Candle Holder
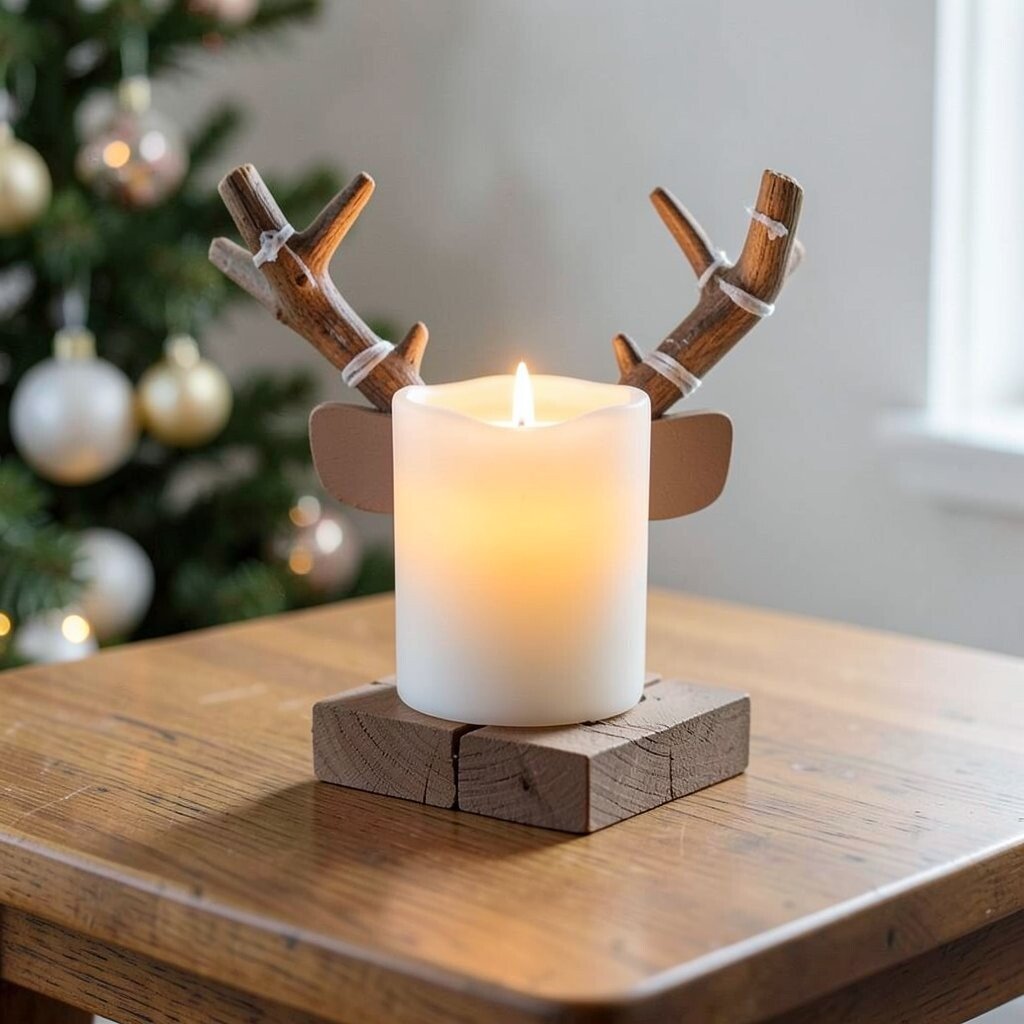
Picture simple blocks or wooden scraps turned into a reindeer-shaped candle holder. It gives a warm glow and looks polished on a side table.
Glue small wooden pieces into a block base, then paint it in a muted brown and add two tiny “antler” branches with hot glue. Use a pillar candle or LED candle inside a shallow center space so it stays safe and stable.
5. Wrapping Paper Star Wall Art
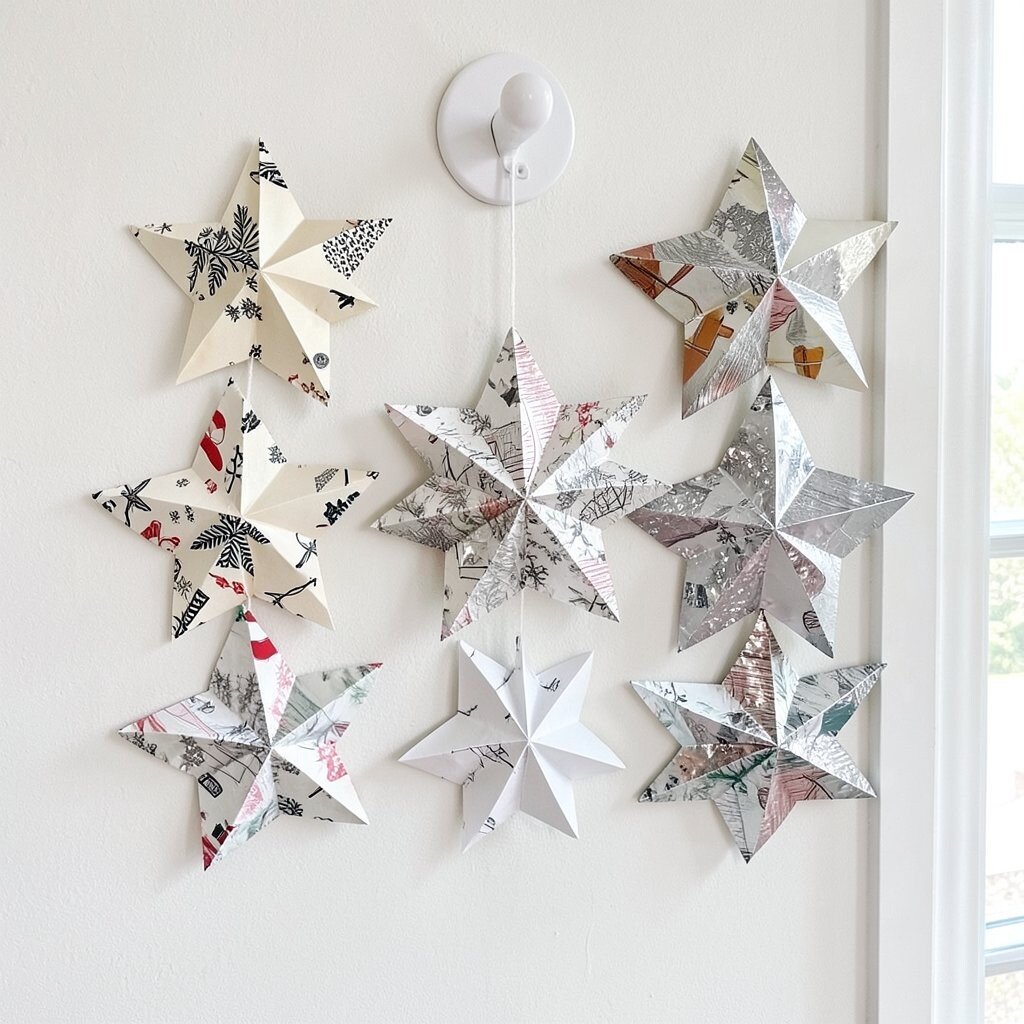
Visualize a wall of folded stars cut from leftover wrapping paper, catching light like little confetti. It feels bright and festive without needing new supplies.
Choose wrapping paper with thick patterns or metallic prints, then fold and cut simple star shapes using templates you trace from scrap paper. Glue the stars onto cardstock backing, and layer them by slightly offsetting each one.
Hang the finished piece on a command hook so you can move it around as your decor changes. For personalization, mix a few plain cream shapes with bold designs so the wall looks balanced.
Since you’re using leftovers, the cost stays very low, and the result feels more unique than store prints. A current trend is using metallic accents and clean geometric shapes, and this fits that look nicely.
6. DIY Holiday Table Runner from Fabric Scraps
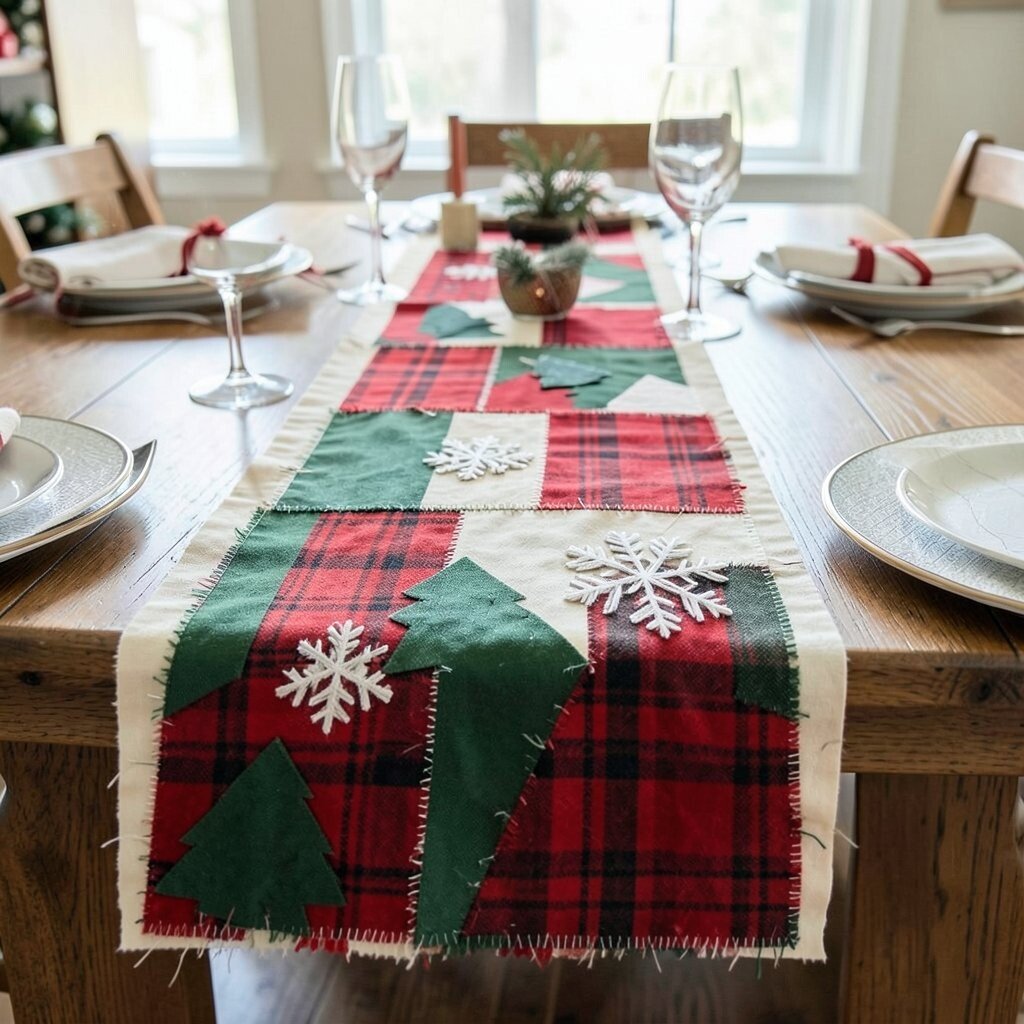
Imagine a soft table runner made from fabric scraps that you can see and feel every time you set the table. It adds comfort and makes the dining space feel special.
Choose several coordinating fabrics like red flannel, green cotton, or cream muslin, then cut them into strips and stitch or hand-sew them together. If sewing is too much, you can use iron-on adhesive or fabric glue for quick attachment.
To keep it practical, add a simple backing and hem the edges so it doesn’t fray. Personalize it with a few appliqué shapes like small trees or simple stitched snowflakes using contrasting thread.
Cost considerations are great because you can shop your own closet or use old bedding. This kind of mixed-texture decor is popular right now, especially for cozy, homey holiday looks.
7. Mason Jar Snow Globe Centerpieces
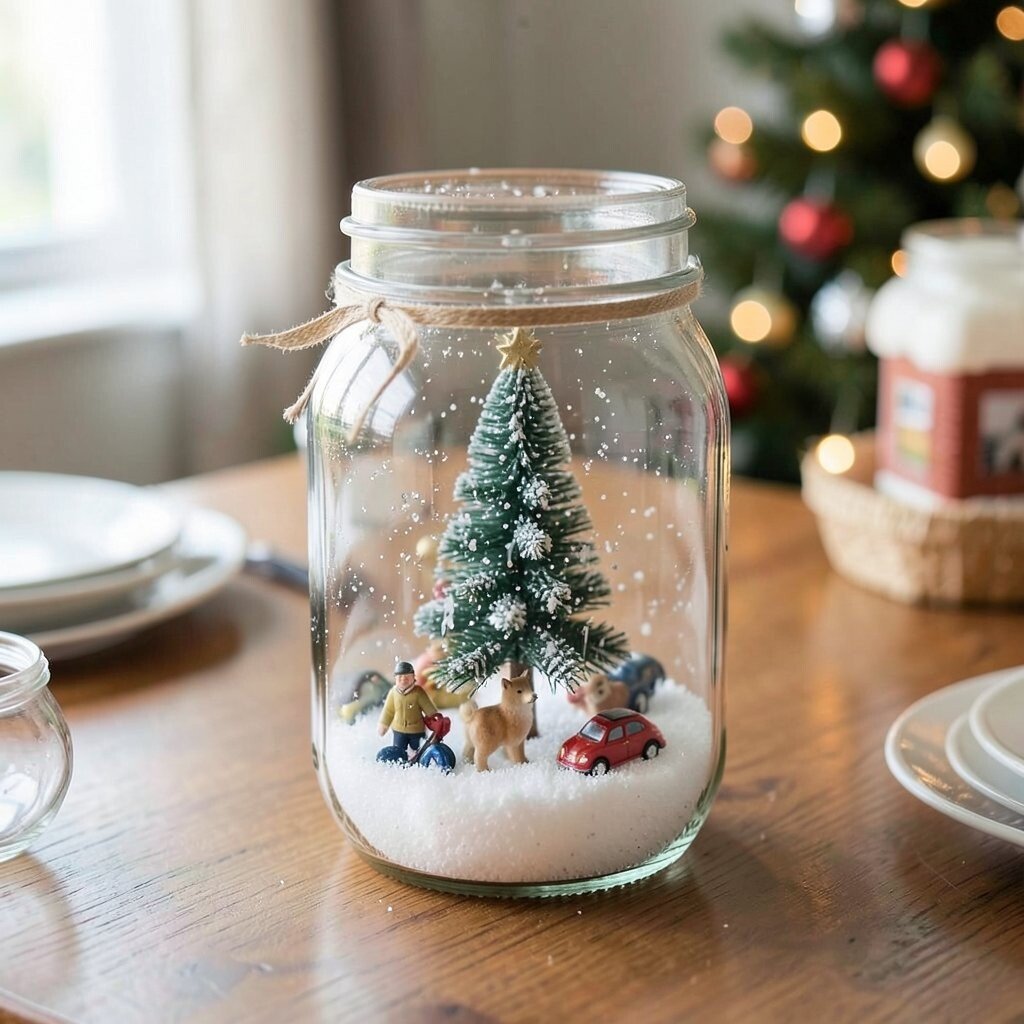
Think of a jar centerpiece with fake snow falling inside, sitting right in the middle of your table. It looks magical because the jar shape feels classic and contained.
Use clean mason jars and add a small figurine or bottle brush tree secured with hot glue. Add water mixed with a little clear glue or glitter-safe “snow” material, then seal with a lid or ribbon ring.
For practical tips, avoid overfilling so it’s easy to shake gently, and choose figurines that won’t float away. Personalize by swapping the theme each year, like tiny cars, minis, or winter animals.
Costs can be low if you already have jars, and thrift stores often have cheap holiday trinkets. The uniqueness is in the custom scene you build, and the current trend is mini winter villages made with everyday glass containers.
8. No-Sew Burlap Bow Door Hanger
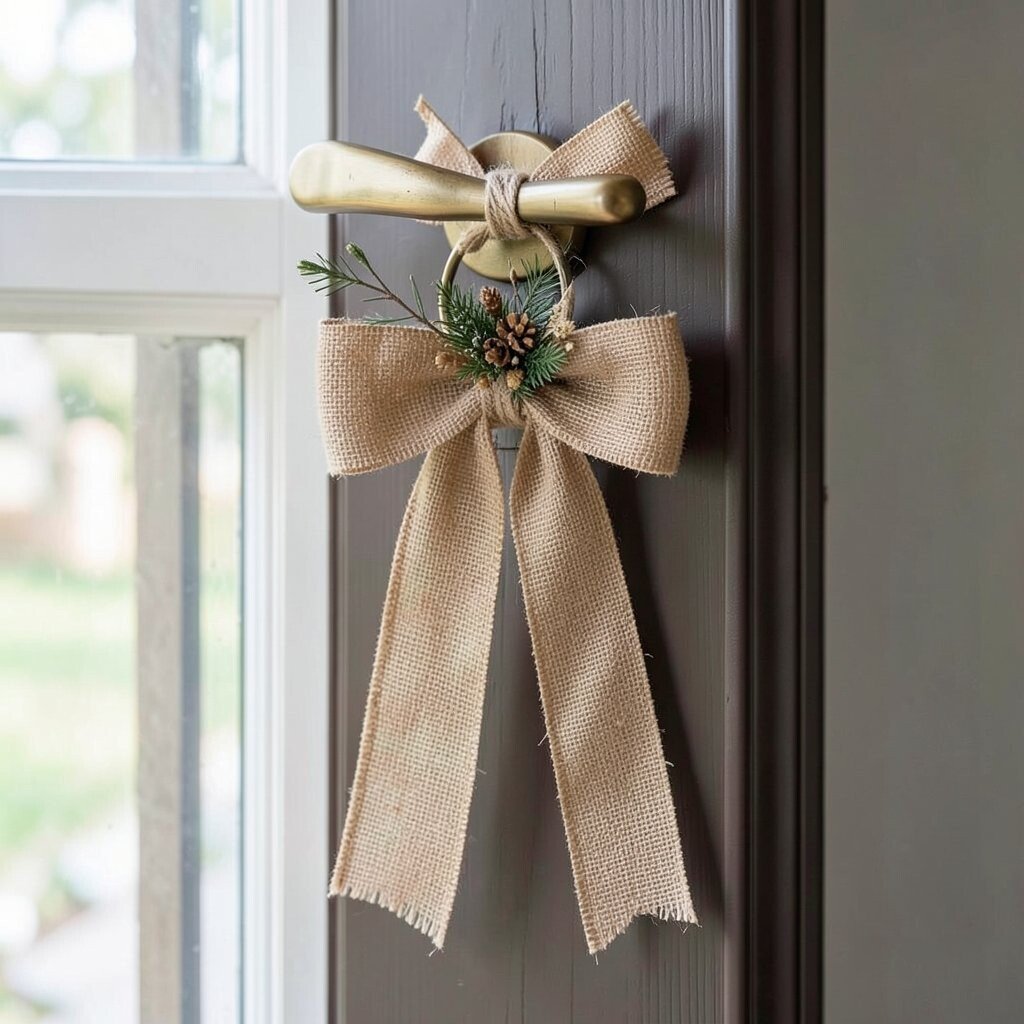
Picture a burlap bow hanging from your door handle, with a few sprigs peeking out like it’s wearing a festive scarf. It gives a welcoming look without taking over your whole entryway.
Cut long strips of burlap, fold each strip into loops, and tie them around a simple base made from cardboard or a wire ring. Add ribbon tails and secure with twine, then attach a small cluster of faux evergreen or dried herbs.
9. Ornament-Inspired String Light Backdrop
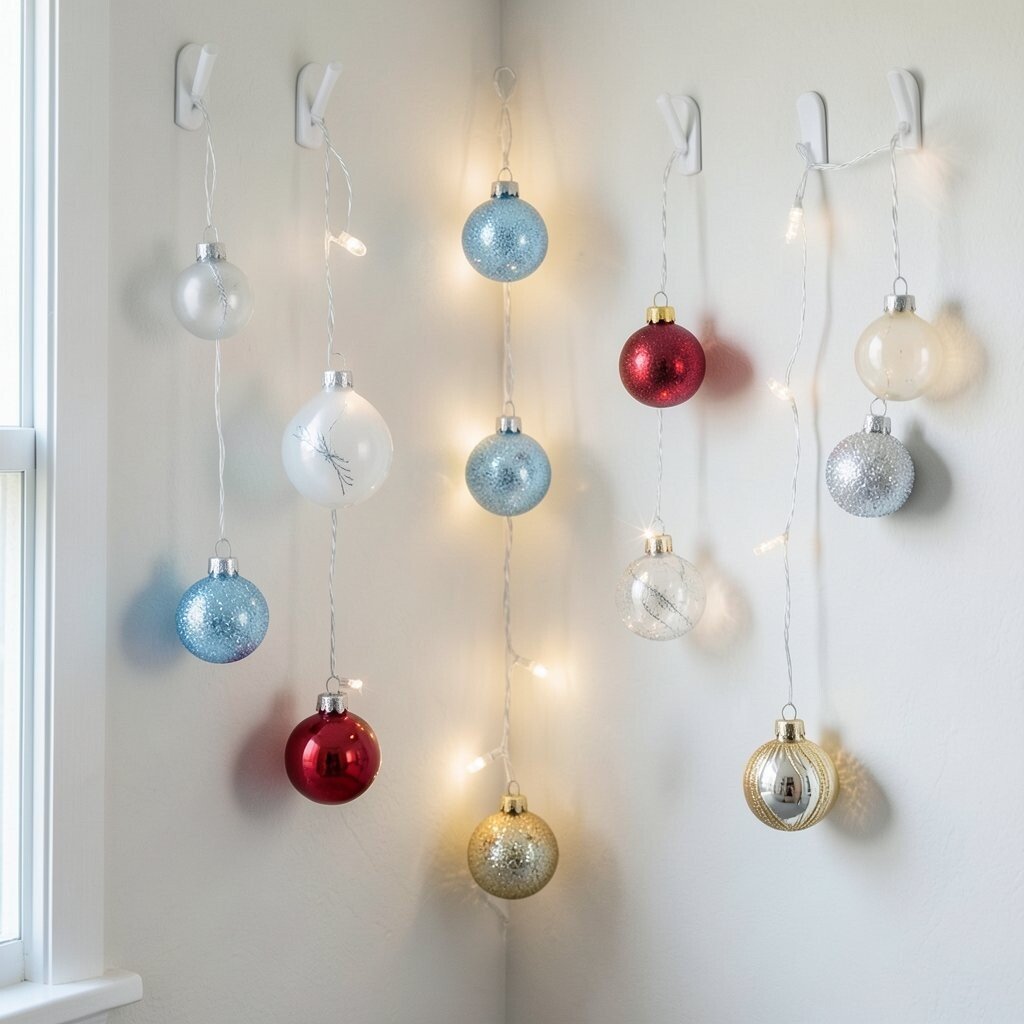
Imagine a backdrop where string lights are wrapped with ornaments like they’re floating in midair. It turns a plain wall into a photo spot for holiday pictures.
Pick a wall corner, then hang a light strand vertically or in a gentle curve, securing it with hooks that won’t damage paint. Thread lightweight ornaments onto thin wire and tuck them around the lights so they sit at different heights.
For practical tips, use shatterproof ornaments and avoid heavy glass pieces at shoulder level. Personalize with a color theme like icy blues and silvers for a cool trend, or classic red and gold for a timeless vibe.
Costs depend on what you already own, but cheap craft ornaments work well and you can reuse them every year. The benefit is that you get big visual impact while the build takes only an afternoon.
10. Cork Board Holiday Messaging Tiles
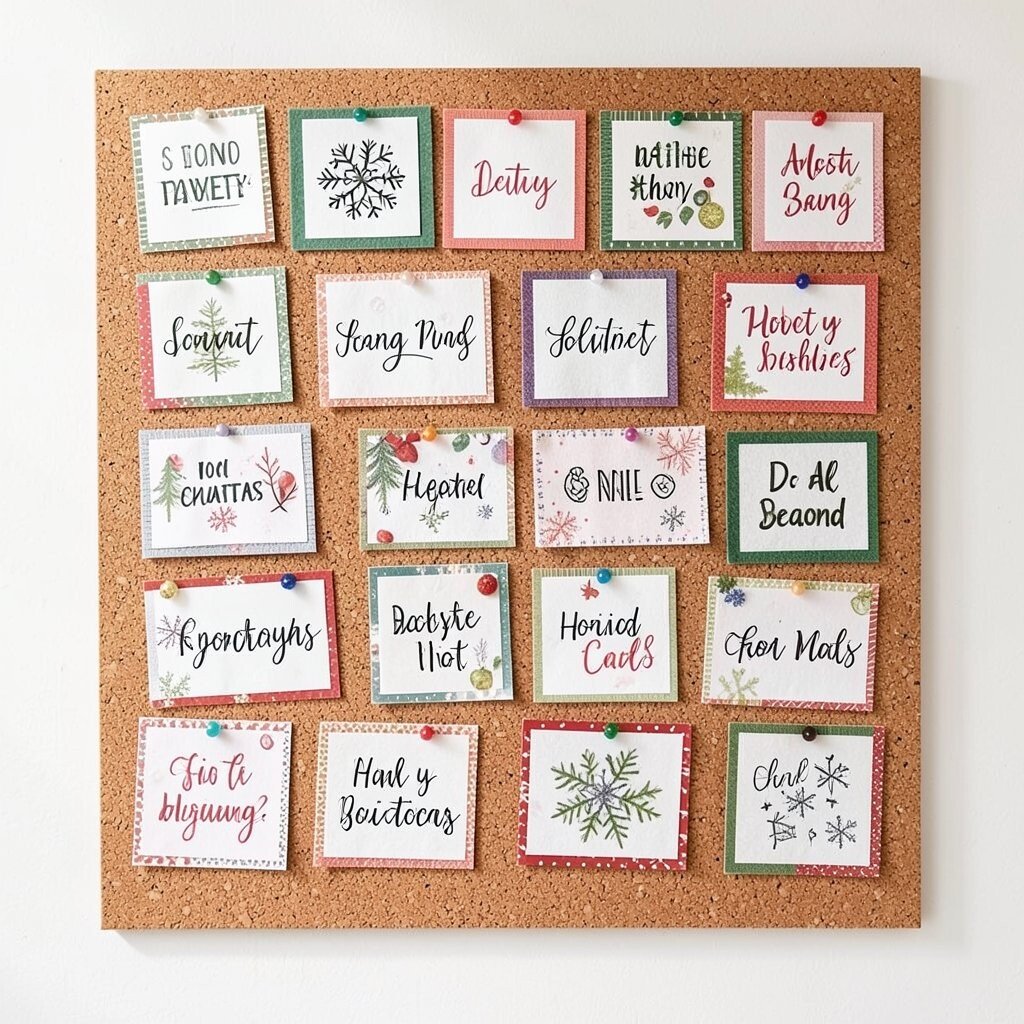
Think of a cork board or foam board covered with cheerful message tiles that you can swap all season. It feels interactive because it updates as you add cards, notes, and mini photos.
Cut small squares from cork scraps or thick felt, then cover them with festive paper or plain fabric and glue a border trim. Pin them onto the cork board with tiny pushpins, and add a few mini magnets if you prefer.
To keep it practical, use a consistent grid so it looks neat and not messy. Personalize it by adding handwritten greetings, small draw-on snowflake marks, or stamped icons using leftover holiday stamps.
11. Evergreen and Fruit Peel Garland
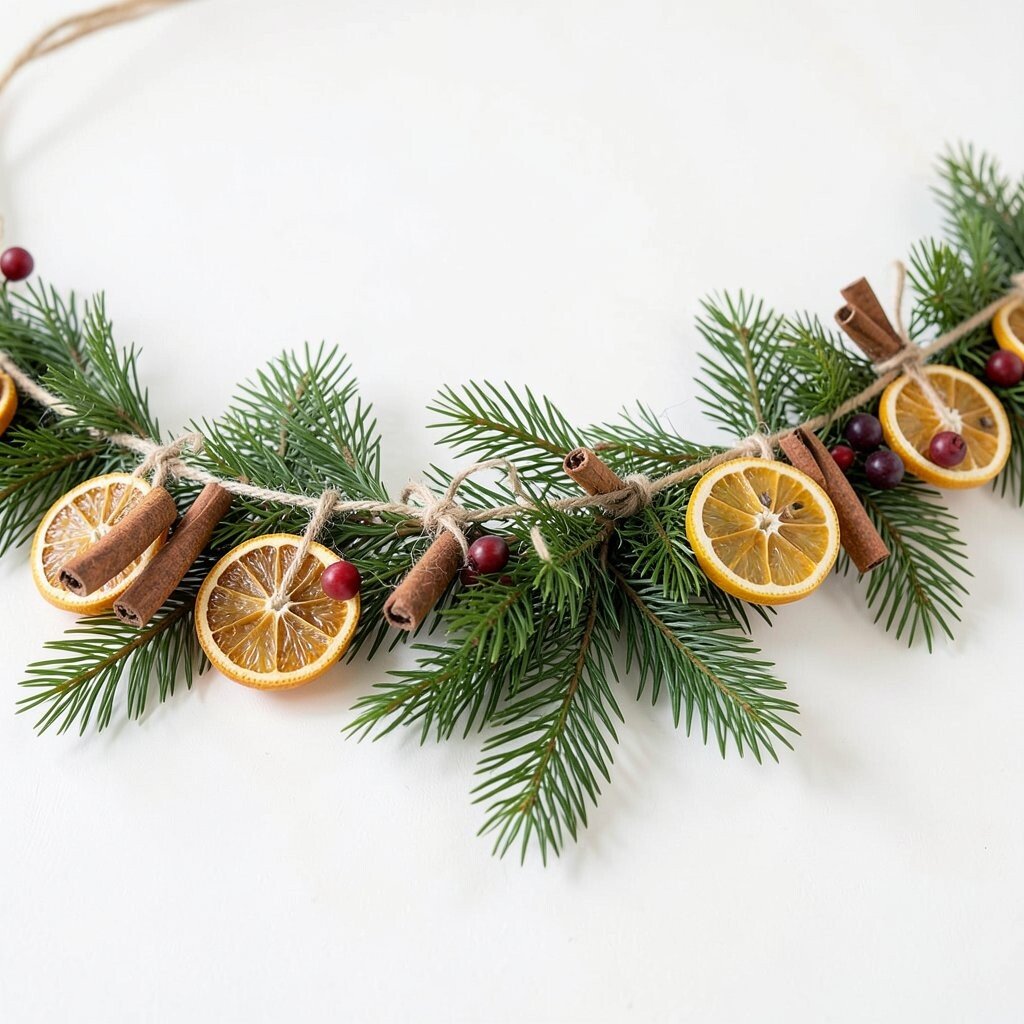
Picture a garland made from faux evergreen plus dried fruit slices that look like little ornaments. It gives a natural, colorful vibe that feels fresh even when it’s just decor.
Arrange evergreen stems along a twine line, then tie them in small groups so the garland stays flexible. Add dried orange slices or lemon rounds with twine loops, and tuck in a few cinnamon sticks for a warm scent boost.
For practical tips, let the fruit slices dry fully if you’re making them yourself, so they don’t leave sticky moisture. Personalize the color by adding berries in the same shade family or using ribbon in a matching tone.
Cost considerations are usually low because you can use craft evergreen you already have and dried fruit can be made from kitchen leftovers. This type of botanical-and-fruit style is trending because it looks organic and not mass-produced.
It’s unique because the aroma and the color stay together, making the garland feel alive.
12. Glittered Pine Stem Table Sprigs
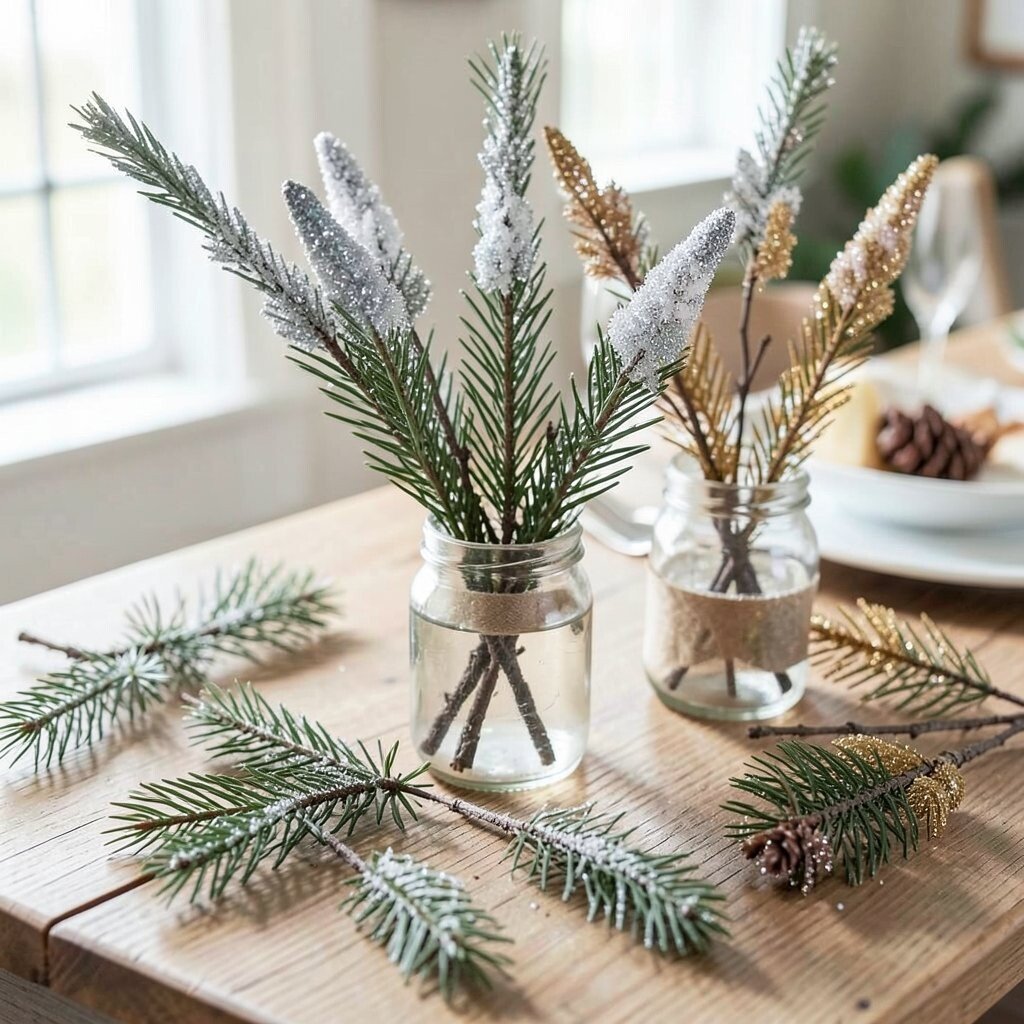
Imagine small pine stem sprigs scattered across your table like winter center hints. They feel simple, but they make the whole space look more styled.
Gather straight stems from faux greenery or dried branches, then lightly coat the tips with glue and dip them into glitter or coarse salt for a snow effect. Place each sprig into a small vase, jar, or even a folded napkin ring.
For practical setup, keep glitter on the tips only so it won’t shed too much onto plates. Personalize by matching glitter color to your decor, such as silver for cool modern styling or gold for a classic holiday shine.
Costs are friendly because you can use foraged branches or reuse faux stems. The benefit is quick placement, since you can set these sprigs down in minutes and get instant polish.
13. DIY Holiday Window Frost with Stencils
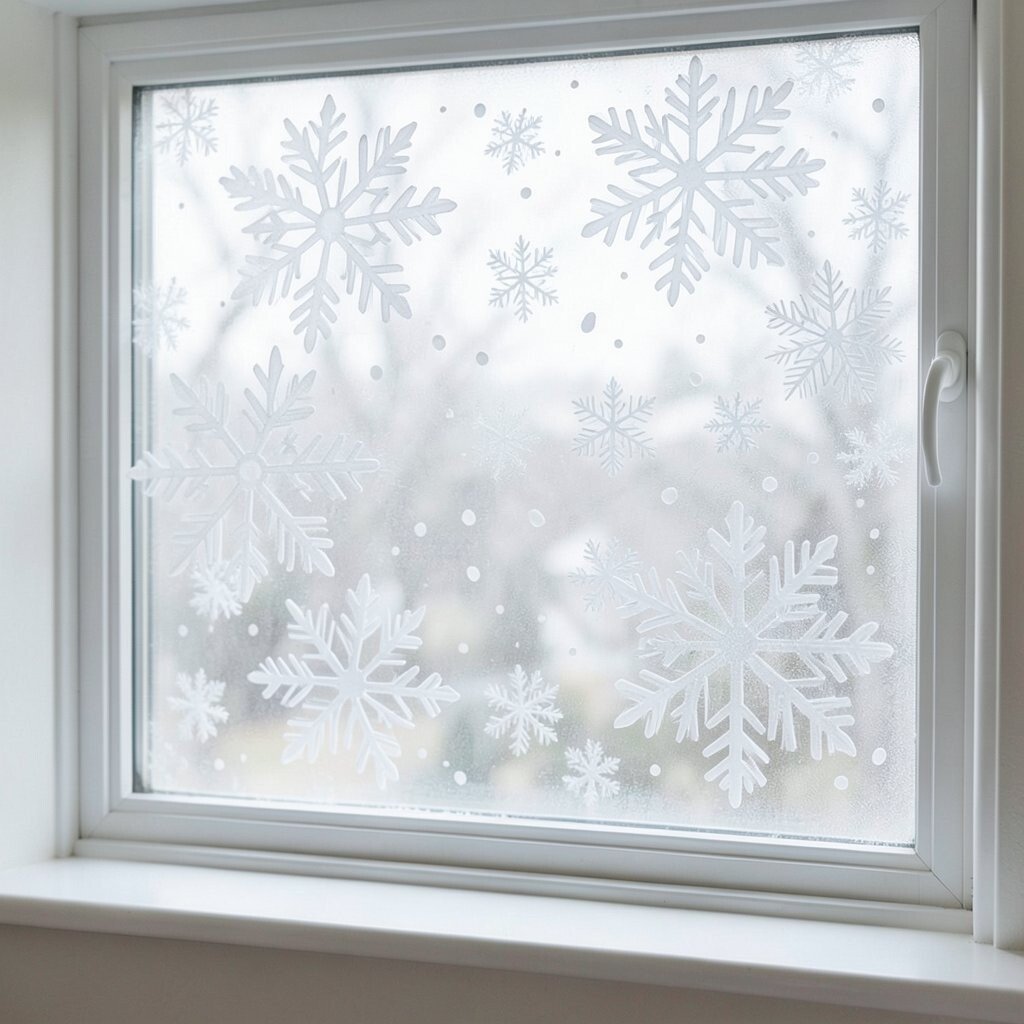
Picture your window with soft, frosty patterns like snowflakes that actually belong there. It looks airy and bright because it uses negative space and light.
Use removable stencil film or paper stencils, then spray a light dusting of window paint or use a sponge to dab white craft paint carefully. Work slowly around the edges so the design stays crisp, then peel the stencils away while the paint is still slightly tacky.
To keep it practical, test the product on a small corner first and choose water-based paint if you want easier cleanup. Personalize it by mixing large snowflakes with smaller dots and adding a few subtle lines to suggest falling snow.
Cost considerations are low because stencils can be reused and window paint can come in a small bottle. This idea matches current trends of “quiet winter” looks that feel modern, not overly busy.
14. Sock Snowman Mantel Set
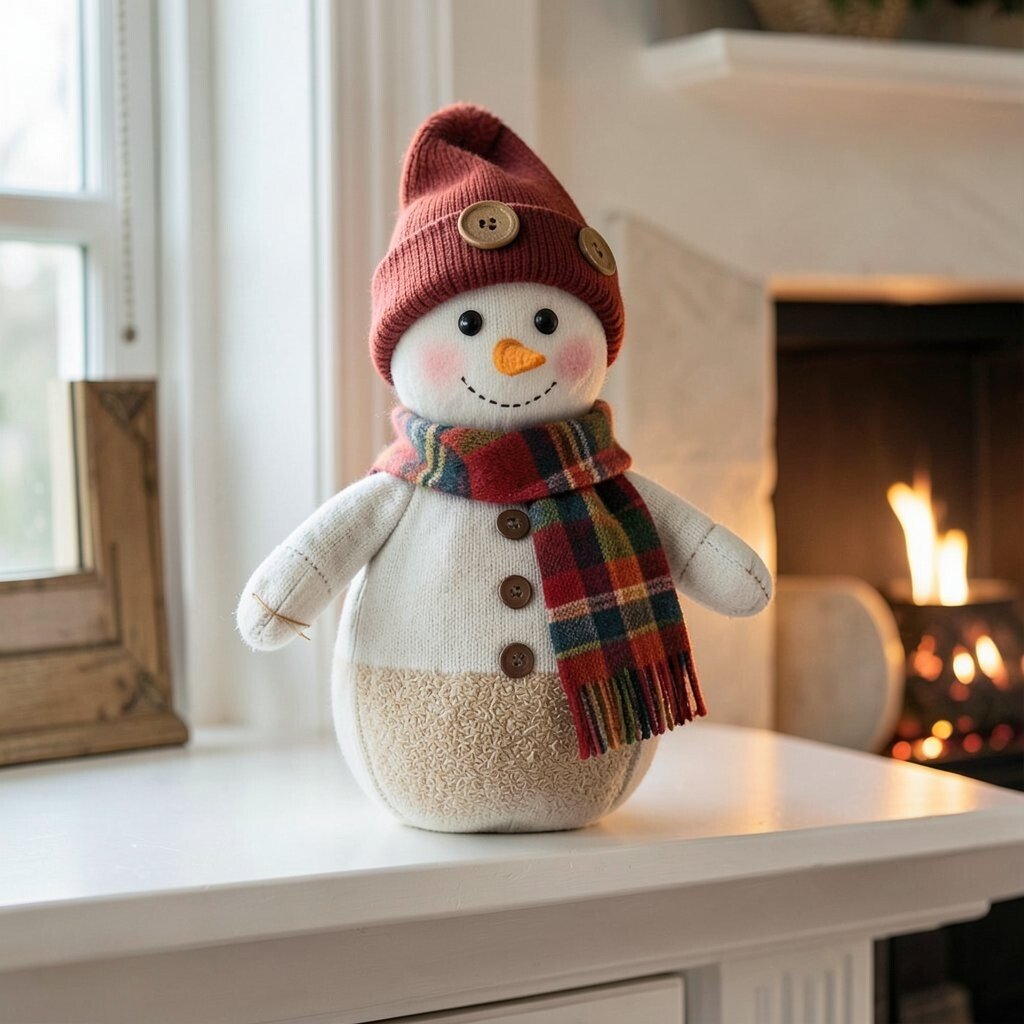
Think of a sock snowman standing on your mantel with a cozy handmade face and a warm little hat. It adds charm because it feels playful and personal.
Fill a clean sock with rice or fiberfill for the body, then tie off the top with string to shape the head and add a small scarf. Use the second sock for a hat by cutting and stitching or folding it into a simple beanie, and decorate with buttons, felt, or stitched features.
For practical tips, secure all decoration with strong thread or hot glue so it lasts through the season. Personalize by choosing fabrics you love, like a plaid scarf for classic style or a solid knit scarf for a clean modern look.
Cost-wise, this is a budget win because it uses leftover socks and simple craft supplies. The uniqueness comes from your fabric choices, so each snowman ends up looking like your own little winter character.
Place it near warm lighting so the handmade textures show and the whole mantel feels inviting.
Seal the finished pieces with a quick fabric-safe spray if you want extra durability.
Enjoy the process, and adjust the sizes to match your decor space.